Concrete Repair: How to Select the Right Materials and Inject the Right Epoxy Injection

Cracked and chipped concrete can pose safety issues, from trip hazards for small children to slippage hazards for the elderly. But quick-setting cement is an effective solution. To ensure that the repair material will bond to existing concrete, the project area should be dampened prior to applying the product. Otherwise, the patch may absorb water, resulting in surface color inconsistencies, weakened bonding, and shrinkage cracks.

Concrete Repair

Concrete Repair Colorado Springs are necessary for structures that have deteriorated beyond the point of safety or serviceability. Unfortunately, increased concrete repair activities due to durability failure have a significant negative impact on society worldwide through natural resource depletion and inert waste generation. This is why engineers must strive for the design of eco-efficient repair systems that attain specified performance levels without compromising structural integrity.

The most common reason for a repaired concrete structure to fail is the non-bonding of the repair material to the host concrete substrate. The quality of the bond that develops between repair materials and the damaged concrete is influenced by several factors, among which are a proper choice of repair materials and the care taken in preparing the base concrete for application.

For example, using unmodified Portland cement mortar or grout in a load-bearing structural member might result in a poor bond with the existing concrete. In order to achieve a robust bond with the host concrete, the surface preparation must include roughening and exposure of aggregates in addition to cleaning.

It is also important that the host concrete be properly textured and free from loose friable materials prior to the application of the repair material. This is achieved by sandblasting or power sweeping the concrete surfaces to create a rough surface texture that enhances bonding with the repair material.

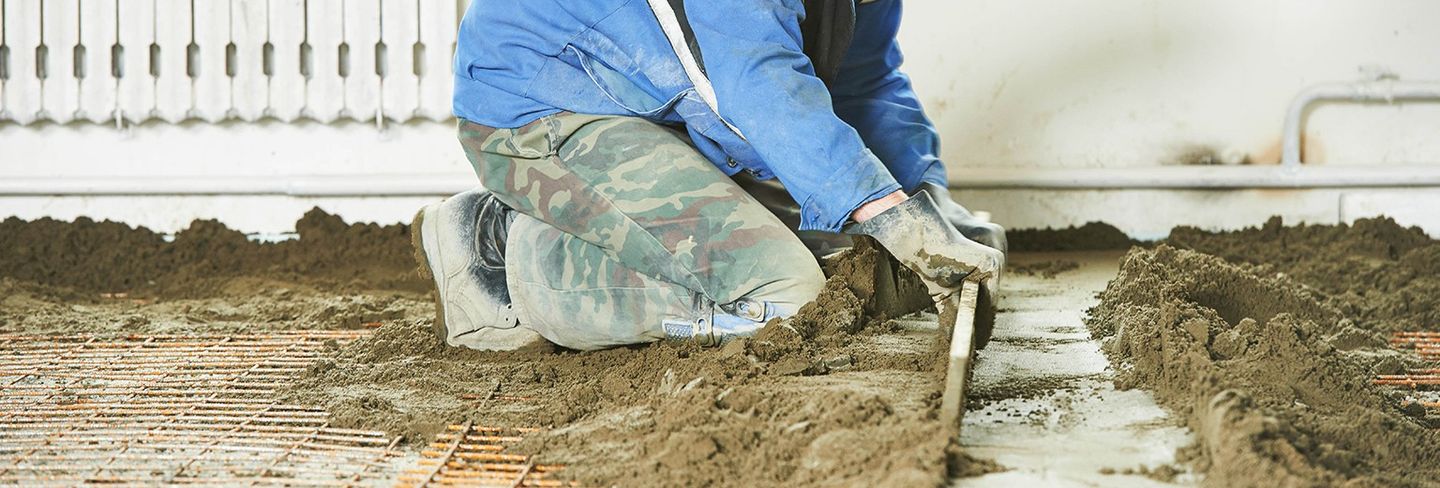
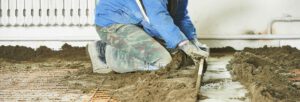
Once the surface is cleaned, the operative should use a spray paint can to outline the areas of concrete that need to be reinforced or reconstructed. This way, the rebar is clearly marked so that it can be properly cut and covered with new concrete during the repair process. Additionally, the operative should hammer all spalled or severely cracked concrete and expose all corroded reinforcement steel.

Finally, the operator should test the existing concrete for its tensile strength. This is done by performing a pull-off adhesion test in accordance with ICRI’s Guideline 210.3. If the tensile strength of the prepared surface is significantly less than that of the concrete, additional surface preparation may be required.

For optimum results, contractors should use a concrete repair product that is designed for the type of repairs they are performing. Many of these repair products are polymer-modified, meaning that they contain a Portland cement base but have added polymers that result in improved durability and bond strength. In addition, these concrete repair products typically require much less water than traditional Portland cement mixes, reducing the amount of time and energy spent mixing them.

Materials

The type of repair material used in a concrete repair project will greatly affect its performance. Contractors must be sure they are using the best material for the job and that it will bond well to the existing concrete. In order to determine the right materials for a specific project, contractors should perform a series of tests. These include flexural, shear, and push-out tests; slant shear tests; and pull-out tests. These tests help determine the strength and bond strength between the repair material and the concrete substrate.

Portland cement mortar, or grout, is the most commonly used repair material for concrete. It is readily available and inexpensive, but it is not as durable or tough as a more sophisticated material such as polymer concrete. Polymer concrete is a synthetic material that can be customized for different applications. It is often formulated with a blend of resins and fillers. It is resistant to corrosion, has good adhesion, and is easy to install.

In addition to selecting the correct repair material, contractors need to ensure they have the proper equipment for the job. A hand broom and a pressure washer are both essential tools for the preparation of the repair site. The broom should be used to remove any dirt, loose debris, or oil that could interfere with the bond between the new material and the concrete. The pressure washer should be able to reach the required PSI for cleaning.

A wide range of repair materials are available, each with its own advantages and disadvantages. Selecting the right repair material for a particular job depends on many factors, including the type of concrete, the size of the area to be repaired, and the desired working characteristics of the new material. Contractors should also consult the manufacturer of the repair material for expert insight into which product is best suited for each project.

During the repair process, it is important to keep in mind that the interface between the new and old concrete is an inherently weak zone. Despite the high shear and tensile strength of the repair material, this region can still delaminate from the substrate due to interfacial stress concentration effects caused by the difference in porosity and pore size between the two materials [51]. Therefore, it is necessary to characterize the interfacial transition zone for effective concrete repairs.

Injection

Epoxy injection is an economical method of repairing non-moving cracks in concrete walls, slabs, and columns. It bonds or welds the crack together to restore the structural integrity of the concrete to its pre-cracked strength and stiffness. The process consists of applying a surface cap of nonsag epoxy to confine the crack, installing injection ports in drilled holes at close intervals along horizontal, vertical, or overhead concrete cracks, and injecting epoxy under pressure.

Before starting the injection, scrub the crack clean of loose concrete debris and dust. A wire brush, sand blaster, or compressed air can be used to achieve this. Then, tap 3-in. (10d) finishing nails partway into the wall, spaced about 12 in. apart.  These serve as alignment points for the injection ports. Lastly, sweep the area to remove any standing water or moisture.

Injection is an excellent solution for parking garages, residential and commercial concrete foundations, basements, and other below-grade structures where water intrusion is a problem. When used with the right polyurethane or epoxy crack sealant, it can prevent further cracking and deterioration.

The key to a successful concrete crack injection is to identify the original cause of the cracking. If the source of the cracks has not been determined and remedied, the cracks will most likely recur. Once the cause is identified, an epoxy injection will effectively repair the cracks and restore the concrete structure to its original design.

To ensure the epoxy will not debond or crack during curing, it is important to select a material that is shrink-compensated and free of any fillers that will create unsightly feathering. Also, the tensile strength of the injected material should be similar to the tensile strength of the concrete to ensure the injection is not subjected to additional stresses that could weaken or debond the repair.

Before the crack is injected, spread some sealer on the base of one of the injection ports, being careful not to plug up its hole. Then slide the port over one of the nails sticking out of the crack, pressing it to the wall to anchor it. Next, install the remaining ports at appropriate intervals along the crack. Be sure to follow the manufacturer’s instructions for the spacing and positioning of the ports.

Bonding

Concrete repairs fail because of the lack of a good bond between the new repair material and the existing concrete. The problem is exacerbated by the use of inappropriate materials and poor surface preparation. Contractors need to select the right repair materials for a project and ensure that they have a good understanding of how to use them correctly.

One of the best ways to ensure a strong bond is by spraying the old concrete with water before applying the repair material. The reason for this is that some concretes can rob the water from your repair material, which will leave it with insufficient moisture to hydrate cement particles and weaken its strength.

This can be done using a hose or a power washer with a pressure of 5000 psi or higher. This will remove dirt, oil, and other debris from the old surface that could prevent the repair material from adhering. In addition, it will make sure that the old surface is free of chloride contamination that can cause corrosion.

Once the old surface is clean, a good bond can be achieved by spraying it with water and then using a spray can of a bonding agent that is compatible with the repair material. This will help to create a good mechanical bond and give the new concrete the best chance of staying bonded for its entire lifecycle.

There are many different bonding agents that can be used for concrete repair. Some of the more common ones are non-re-emulsifiable polyvinyl acetate (PVA) latex and emulsifiable acrylate latex. Both of these can be applied by either spraying or dripping onto the surface. Non-re-emulsifiable PVA latex provides a very thin film that offers good durability, resistance to chemicals, and aging characteristics. It also works well as a binder in water-based concrete coatings and sealers.

Emulsifiable acrylate latex can be used in a similar manner to PVA, but it has the advantage of being thicker. This helps it to be able to fill in cracks and crevices better than PVA, and it will provide a good physical bond with the old concrete surface as well.

What Does a Commercial Plumber Do?

Commercial plumbers deal with larger pipes and systems designed for high usage. Plumbers Aurora CO also follow different guidelines and regulations when working in office buildings, hospitals, and other commercial spaces. One small leak in a large commercial building can cause serious damage. Many companies rely on preventative maintenance to catch problems before they become serious.

Plumbing Services

Commercial plumbing is the installation and maintenance of water systems in commercial buildings, such as malls, offices, restaurants, hospitals, and more. These systems must support hundreds of people using them simultaneously, so they’re under much more strain than residential systems. Because of this, they’re prone to problems like clogging and leaks more often. In addition, the pipes are typically larger and more complex than those in homes. These factors make it important to use a licensed, experienced commercial plumber for installation and repair work.

While any plumber can install plumbing fixtures, it takes a special skill set to understand the ins and outs of commercial plumbing. These plumbers must be able to read blueprints, understand how to work with large scale building systems, and know how to install plumbing that can handle the increased usage and pressure. Additionally, they need to be able to work well with contractors and follow strict building codes.

In addition to being able to work with a wide variety of building materials, a commercial plumber needs to have a range of tools. Some of these are standard, such as pipe wrenches and plungers, but others are more specialized. For example, they may need to use tile saws, power washers, and industrial wet and dry vacuum cleaners. Unlike residential plumbers, who usually only need to work during business hours, commercial plumbers often must come in outside of these times.

Because commercial buildings are used so frequently, they require more frequent inspections and maintenance than homes. Depending on the type of business, this might include inspecting toilets, sinks, and showers for leaks or blockages. In some cases, the plumber may recommend upgrading parts of the plumbing system to improve efficiency or reduce costs. This is especially true for older buildings with outdated plumbing. Newer pipes are more resistant to corrosion and have better flow rates, so they’ll save money in the long run. In addition, many plumbers offer preventative maintenance plans that can help businesses save money and avoid costly repairs in the future.

Maintenance

Commercial plumbing systems are usually larger and more complex than residential ones. They often have multiple floors, many sinks and toilets, and a lot of water outlets. This means that any damage can cause a lot of problems quickly. That’s why it’s important to find a plumber who offers maintenance services as well. A good commercial plumber will be able to spot issues before they become large problems and fix them before they get worse.

Besides checking for leaks and other problems, commercial plumbers also help with the cleaning of drain lines and sewer lines. This is an important part of maintaining a commercial plumbing system because it helps to prevent any kind of waste buildup that can lead to a clog or backup in the line. Moreover, it’s crucial for the health and safety of everyone in the building that the waste is properly disposed of.

Because commercial buildings have a lot of people living or working in them, they tend to have stricter regulations when it comes to plumbing. This is why it’s important to hire a plumber who has experience with commercial projects and understands the different types of pipes and fixtures that are used in these buildings.

Another thing that you should look for in a plumber is their reputation. Make sure that you choose a plumber who has a good reputation and is known for being reliable and trustworthy. You should also check their customer service skills to see if they are friendly and helpful on the phone. It’s best to avoid plumbers who are rude or sarcastic when speaking to customers over the phone.

Finally, you should also find out whether they offer a bundled package of services or if they charge per hour for labor and then by the cost of parts. This can make a big difference in the overall price of the project. It’s also a good idea to look for online reviews of plumbers before hiring them for any work. If you can’t find any online reviews, ask for references from friends or colleagues who have used their services.

Repair

A commercial plumbing system is more complicated than a residential one. There are more sinks, toilets, and urinals, as well as steam systems, water heaters, and fire sprinklers. Because of this, they are more prone to damage and need regular maintenance. In addition, a single problem can affect many people at once, so it needs to be fixed quickly. For example, if a kitchen pipe bursts and floods the building, it could shut down business for hours or even days. This means that the plumbers need to be available 24/7 to handle emergency situations.

When looking for a commercial plumber, you should check their reputation and experience. They should also be able to provide references from previous customers. This will help you determine whether their work is up to your standards. In addition, a reputable commercial plumber will offer a warranty on their services. This will give you peace of mind knowing that if something goes wrong, they will be there to fix it.

Since a commercial plumbing system has more occupants than a residential one, it experiences a higher rate of wear and tear. This is because of the number of people using the sinks, toilets, and showers daily. Commercial plumbers can repair these systems quickly and effectively because of their specialized training. In addition, they have a better understanding of complex building structures. They can also use specialized equipment like video inspection cameras to find the source of the problem.

A good commercial plumber should have a wide range of skills to handle all types of repairs. For instance, they should be able to install and repair gas pipes as well as work on sewer and water lines. In addition, they should be able to follow blueprints and understand the requirements of each job site. They should also have basic carpentry skills to help them access hard-to-reach places for plumbing repairs.

If you have a commercial plumbing system, it’s important to get it checked regularly. This will help you avoid costly repairs in the future and ensure that your system is running at its best. Also, routine maintenance will save you money on energy bills.

Replacement

Commercial plumbing is often more complex than residential plumbing. For example, a large office building will have multiple floors and many toilets, sinks, and showers that all need to work properly. Commercial plumbers will install these systems on a larger scale, and they will also repair and replace them as needed. In addition to these services, they may also install water fountains, sprinkler systems, and other fixtures. Commercial plumbers will need to follow blueprint designs and understand a wide range of codes and regulations when working on these projects. They will also need to have some basic carpentry skills when they are installing or repairing pipes in walls or ceilings.

Unlike home plumbing systems, commercial systems are used much more frequently and intensely. Because of this, they will need to be inspected and repaired more frequently. Commercial plumbers will be able to diagnose and fix problems more quickly because they have the experience and the equipment necessary to do so. In addition to repairing and maintaining these systems, they will also help businesses maintain their plumbing by offering service agreements.

When looking for a commercial plumber, it is important to consider their past clients and reviews. You can usually find this information on the plumber’s website, so make sure to check it out. This will give you a good idea of the type of work they have done in the past and whether or not they are a good fit for your business.

When choosing a plumber, you should also look for one who is licensed and insured. This will ensure that they have the proper training and certification to work on your business’s plumbing system. You should also check with your local authorities to see what licensing requirements there are for plumbing professionals in your area. In addition, it is a good idea to choose a plumber who has been in the industry for a long time, as this shows that they are reputable and have a history of providing quality services. Also, be sure to check out their services list to ensure that they cover the specific needs of your business.

Drywall Repair – How to Make Drywall Repairs Almost Invisible

Fortunately, even minor drywall damage is often easy to fix. You can make most dings and holes virtually invisible with a few layers of joint compound, sanding, and painting.

Drywall Repair

Drywall Repair Las Vegas can repair most types of cracks in drywall. However, if the cracks are in a foundation wall, only an experienced structural engineer can repair them permanently. Foundation movement can be caused by a number of factors, including changes in the soil composition around the home, water damage to the foundation slab, poor construction and improper installation of drywall.

Small dents from picture frames or hooks and small holes caused by nails, screws or doorknobs are the most common drywall repairs. These are simple enough that most people can do them themselves.

Drywall cracks, especially those in walls and ceilings, are common in new and older homes. They are often a result of building movement but can also indicate other issues that need to be addressed. Some cracks require a professional to repair.

Most cracks in drywall are cosmetic and easy to fix. When the drywall panels are first installed they are taped and mudded over the seams to create a smooth surface. Over time the drywall will expand and contract with changes in temperature, humidity and soil moisture content. This will cause the drywall to crack.

Wide cracks are a red flag and should be addressed immediately. They indicate that the foundation is shifting which will likely need to be fixed by a professional. If the cracks are in a vertical wall, check to see if they extend into the trim or woodwork. If so, a professional should be called to assess the damage and make recommendations.

If the crack is in a horizontal wall, carefully widen it with a utility knife and remove the cracking drywall compound from the wall surface. Use a razor blade to cut a v-shaped notch about 6″ to 12″ from both ends of the damage (Images 1 and 2), avoiding removing solid, well-adhered compound beyond the crack. Fill the crack with a new drywall compound, using a drywall knife to spread it evenly across the damaged area (Image 3).

Another common problem with drywall is nail pops which occur when nails pull away from the stud and protrude through the drywall tape or paint. This is a sign that the drywall was not properly installed and should be repaired as soon as possible to prevent further problems.

Holes

Small holes from nails, screws and other wall anchors can often be repaired with drywall patch. This is done by taping the area and filling in the depression with a putty knife. For a perfect repair, you should feather out the edges of the compound with your knife. Using a feather edge will make the drywall repair virtually invisible. Larger holes, however, require a different method of repair and should only be tackled by seasoned pros.

When dealing with larger holes, you will want to start by identifying the studs that surround the hole. This is very important since utilities like wires and pipes run along the studs in your walls. Using a stud finder and a carpenter’s square, you will be able to locate the center of the nearest stud on either side of the damaged area. By locating the studs, you will be able to properly secure the drywall patch and avoid touching any electrical or plumbing lines.

Next, you will want to remove any loose drywall paper from the edges of the hole and clean away any dirt or debris that is in the area. You will also want to prepare the drywall patch for installation. A popular option for small to medium sized holes is to use what is known as a California Patch. This is a small, square piece of drywall that has been modified to allow the paper to hold the gypsum core in place. This method is relatively easy to do and is highly recommended for beginners who are new to drywall repair.

Once you have prepared the drywall patch, it can be slipped into the hole and secured with drywall screws. You will want to be sure that the drywall is flush with the existing wall surface, and you will need to sand the patch after it is dry to ensure smoothness. Once you have sanded the patch, apply a coat of primer and paint.

In addition to repairing the drywall patch and priming, you may also need to touch up any texture on the wall to blend in the repair. This will be especially true if your home is a single level and has an open floor plan. You can purchase drywall texture at any home improvement store and follow the manufacturer’s instructions for application.

Tears

The corners and edges of drywall are particularly susceptible to damage. The thin paper and gypsum core can be gouged by heavy furniture or doors being opened and closed too vigorously. If this type of drywall damage is left unattended, it can cause the entire wall to crack.

Cracks and dents are the most common types of drywall repair needed in residential homes. These can be caused by everything from settling of the house frame to a change in the weather. Cracks can also appear as a result of seismic activity, such as the Northridge earthquake of 1994.

When you see a crack, you should start by clearing away the damaged areas and sanding them smooth. You can do this with a hand-held sander or a vacuum sander. When you’re done, it’s a good idea to use a drywall primer to help prepare the area for your patch and paint.

Another type of drywall damage to look for is a corner bead that is dented or loose. The reason these little dents happen so easily is because they’re usually not fastened properly to the stud or joist. This is one of the many reasons it’s important to hire an experienced drywall contractor.

If a nail comes out of the drywall, don’t try to hammer it back in. This could lead to the drywall cracking or pulling away from the wall and will only make the nail hole bigger. If a nail is pulled out of the wall, simply remove it and nail it in at a different spot.

Holes in the drywall can be caused by furniture hitting walls, doors being opened too hard and children playing with toys or other objects that leave marks behind. A hole in a drywall can be unsightly, but more importantly it can allow moisture to enter and cause the drywall to rot or crumble. Holes should be repaired as soon as they are noticed and before moisture causes the problem to worsen.

One of the best ways to protect against this is by using a door knob cover or some other device that will prevent the door from striking the wall. It’s also a good idea to hang heavier items closer to the floor to reduce the amount of pressure put on the walls.

Sagging

Sagging drywall is a serious problem that should be repaired right away. It not only makes the ceiling look sloppy, it can also be a sign of a structural issue that could cause ceiling collapse. The cause of sagging can vary from an improper installation to water damage. If the sagging is caused by water, it is important to fix the source of the leak as soon as possible to avoid further damage and potential safety issues.

A sagging plaster ceiling may also be the result of a weakened support system, such as misaligned joists or framing members. These weak points can create uneven weight distribution across the entire ceiling surface and lead to sagging over time. If this is the case, you should sand the damaged area and apply a spackling paste or joint compound, making sure to follow the product instructions for application and drying.

Drywall panels that are cut too large can also lead to sagging if they are not evenly supported. This can occur when a panel is nailed to the ceiling joists and it is heavier than other panels. To solve this problem, you can add extra screws to the supporting joists or hang new drywall panels that are the proper size.

If the sagging is caused by water, you will need to clean the area and repair any resulting mold growth. Once the mold is removed, you can use a caulking gun to inject acrylic adhesive into the holes in the plaster ceiling. The glue will seep down the sagging section of the ceiling and draw it upward on the wood lath. Once the plaster is drawn up, you can install drywall screws with washers to help hold it in place.

If your drywall has become “pilled” or sagged between the joists, you will need to replace it with new drywall, reports Confide Construction. To do this, you will need to locate the joists, which you can do by examining the ceiling or using a stud finder. Next, screw 1-by-3-inch furring strips to the joists with 2-inch wood screws. Finally, screw the new drywall to the furring strips with drywall screws.