
Fortunately, even minor drywall damage is often easy to fix. You can make most dings and holes virtually invisible with a few layers of joint compound, sanding, and painting.
Drywall Repair Las Vegas can repair most types of cracks in drywall. However, if the cracks are in a foundation wall, only an experienced structural engineer can repair them permanently. Foundation movement can be caused by a number of factors, including changes in the soil composition around the home, water damage to the foundation slab, poor construction and improper installation of drywall.
Small dents from picture frames or hooks and small holes caused by nails, screws or doorknobs are the most common drywall repairs. These are simple enough that most people can do them themselves.
Drywall cracks, especially those in walls and ceilings, are common in new and older homes. They are often a result of building movement but can also indicate other issues that need to be addressed. Some cracks require a professional to repair.
Most cracks in drywall are cosmetic and easy to fix. When the drywall panels are first installed they are taped and mudded over the seams to create a smooth surface. Over time the drywall will expand and contract with changes in temperature, humidity and soil moisture content. This will cause the drywall to crack.
Wide cracks are a red flag and should be addressed immediately. They indicate that the foundation is shifting which will likely need to be fixed by a professional. If the cracks are in a vertical wall, check to see if they extend into the trim or woodwork. If so, a professional should be called to assess the damage and make recommendations.
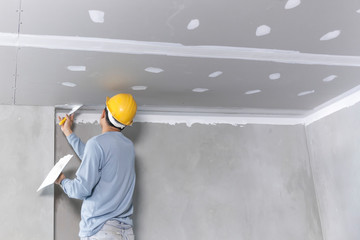
If the crack is in a horizontal wall, carefully widen it with a utility knife and remove the cracking drywall compound from the wall surface. Use a razor blade to cut a v-shaped notch about 6″ to 12″ from both ends of the damage (Images 1 and 2), avoiding removing solid, well-adhered compound beyond the crack. Fill the crack with a new drywall compound, using a drywall knife to spread it evenly across the damaged area (Image 3).
Another common problem with drywall is nail pops which occur when nails pull away from the stud and protrude through the drywall tape or paint. This is a sign that the drywall was not properly installed and should be repaired as soon as possible to prevent further problems.
Holes
Small holes from nails, screws and other wall anchors can often be repaired with drywall patch. This is done by taping the area and filling in the depression with a putty knife. For a perfect repair, you should feather out the edges of the compound with your knife. Using a feather edge will make the drywall repair virtually invisible. Larger holes, however, require a different method of repair and should only be tackled by seasoned pros.
When dealing with larger holes, you will want to start by identifying the studs that surround the hole. This is very important since utilities like wires and pipes run along the studs in your walls. Using a stud finder and a carpenter’s square, you will be able to locate the center of the nearest stud on either side of the damaged area. By locating the studs, you will be able to properly secure the drywall patch and avoid touching any electrical or plumbing lines.
Next, you will want to remove any loose drywall paper from the edges of the hole and clean away any dirt or debris that is in the area. You will also want to prepare the drywall patch for installation. A popular option for small to medium sized holes is to use what is known as a California Patch. This is a small, square piece of drywall that has been modified to allow the paper to hold the gypsum core in place. This method is relatively easy to do and is highly recommended for beginners who are new to drywall repair.
Once you have prepared the drywall patch, it can be slipped into the hole and secured with drywall screws. You will want to be sure that the drywall is flush with the existing wall surface, and you will need to sand the patch after it is dry to ensure smoothness. Once you have sanded the patch, apply a coat of primer and paint.
In addition to repairing the drywall patch and priming, you may also need to touch up any texture on the wall to blend in the repair. This will be especially true if your home is a single level and has an open floor plan. You can purchase drywall texture at any home improvement store and follow the manufacturer’s instructions for application.
Tears
The corners and edges of drywall are particularly susceptible to damage. The thin paper and gypsum core can be gouged by heavy furniture or doors being opened and closed too vigorously. If this type of drywall damage is left unattended, it can cause the entire wall to crack.
Cracks and dents are the most common types of drywall repair needed in residential homes. These can be caused by everything from settling of the house frame to a change in the weather. Cracks can also appear as a result of seismic activity, such as the Northridge earthquake of 1994.
When you see a crack, you should start by clearing away the damaged areas and sanding them smooth. You can do this with a hand-held sander or a vacuum sander. When you’re done, it’s a good idea to use a drywall primer to help prepare the area for your patch and paint.
Another type of drywall damage to look for is a corner bead that is dented or loose. The reason these little dents happen so easily is because they’re usually not fastened properly to the stud or joist. This is one of the many reasons it’s important to hire an experienced drywall contractor.
If a nail comes out of the drywall, don’t try to hammer it back in. This could lead to the drywall cracking or pulling away from the wall and will only make the nail hole bigger. If a nail is pulled out of the wall, simply remove it and nail it in at a different spot.
Holes in the drywall can be caused by furniture hitting walls, doors being opened too hard and children playing with toys or other objects that leave marks behind. A hole in a drywall can be unsightly, but more importantly it can allow moisture to enter and cause the drywall to rot or crumble. Holes should be repaired as soon as they are noticed and before moisture causes the problem to worsen.
One of the best ways to protect against this is by using a door knob cover or some other device that will prevent the door from striking the wall. It’s also a good idea to hang heavier items closer to the floor to reduce the amount of pressure put on the walls.
Sagging
Sagging drywall is a serious problem that should be repaired right away. It not only makes the ceiling look sloppy, it can also be a sign of a structural issue that could cause ceiling collapse. The cause of sagging can vary from an improper installation to water damage. If the sagging is caused by water, it is important to fix the source of the leak as soon as possible to avoid further damage and potential safety issues.
A sagging plaster ceiling may also be the result of a weakened support system, such as misaligned joists or framing members. These weak points can create uneven weight distribution across the entire ceiling surface and lead to sagging over time. If this is the case, you should sand the damaged area and apply a spackling paste or joint compound, making sure to follow the product instructions for application and drying.
Drywall panels that are cut too large can also lead to sagging if they are not evenly supported. This can occur when a panel is nailed to the ceiling joists and it is heavier than other panels. To solve this problem, you can add extra screws to the supporting joists or hang new drywall panels that are the proper size.
If the sagging is caused by water, you will need to clean the area and repair any resulting mold growth. Once the mold is removed, you can use a caulking gun to inject acrylic adhesive into the holes in the plaster ceiling. The glue will seep down the sagging section of the ceiling and draw it upward on the wood lath. Once the plaster is drawn up, you can install drywall screws with washers to help hold it in place.
If your drywall has become “pilled” or sagged between the joists, you will need to replace it with new drywall, reports Confide Construction. To do this, you will need to locate the joists, which you can do by examining the ceiling or using a stud finder. Next, screw 1-by-3-inch furring strips to the joists with 2-inch wood screws. Finally, screw the new drywall to the furring strips with drywall screws.